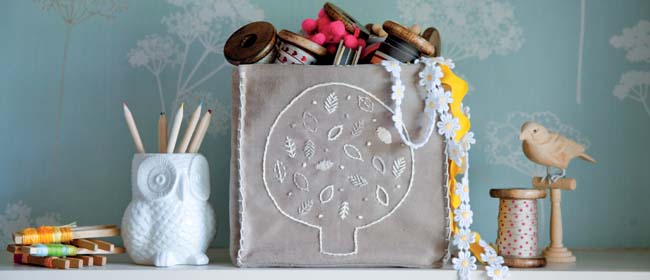
 These super cute fabric boxes feature in Christine leech’s new book, Little Sew & Sew, and we have the step-by-step instructions for you, below.
 Little Sew & Sew is part of Christine’s fabulous new book series called Simple Makes, a creative and affordable set of books that are suitable for crafters of all skill levels.
In this book there are 16 stylish sewing projects, ranging from embroidered cushions and storage containers to the cutest tea cosy, book cover and wall hanging. It includes projects for the home as well as gifts for adults and children. It’s a truly lovely book and would make a wonderful gift for a friend, or a treasured reference for yourself.
We’re thrilled to feature one of Christine’s gorgeous craft project’s, below.
Extracted with permission from Little Sew & Sew by Christine Leech, published by Quadrille and distributed in NZ by Bookreps. RRP $29.99.
Woodland storage boxes
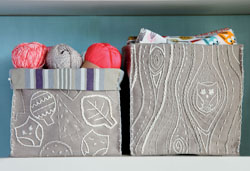 These boxes have an infinite number of uses. I like to keep ribbons and embroidery supplies in mine, but they would look great in a baby’s room holding nappies, socks and bibs or a bathroom storing all your toiletries.
Supplies
For the embroidery
30cm diameter embroidery hoop
Anchor soft cotton thread in the following colours:
beige 386, cream 391 (use the whole skein as this tread is a
twisted cotton and doesn’t easily divide into plies)
For the boxes
150 x 50cm thick calico or cotton twill, for lining
150 x 50cm plain cotton twill for the outer fabric (make sure it’s not too thick or you won’t be able to embroider through it)
Cardboard, if you wish to stiffen your boxes more
TO MAKE THE BOX LINING
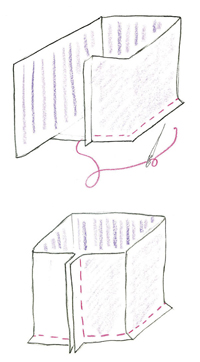 1. Cut a 22 x 22cm square in calico or thick cotton (this includes a 1cm seam allowance) and a 84 x 22cm rectangle (also includes a 1cm seam allowance). Fold the rectangle in half lengthways to find the centre, then make a little mark here with tailors’ chalk. Fold the square in half and make another mark. Line up the two marks and pin together, right sides facing inwards.
2. Pin the rest of the rectangle to the square base, then tack the base to the sides. The box sides will join in the middle of the far side edge. Tack up the short side.
3. Machine stitch the sides in place. It’s easiest to do this if you keep the sides of the box uppermost. Leave a 10cm turning hole in one of the base sides (this will be easier if it’s not the one with the join). Remove the tacking threads. Turn right side out so the raw edges are inside the box then press.
TO EMBROIDER THE DESIGN
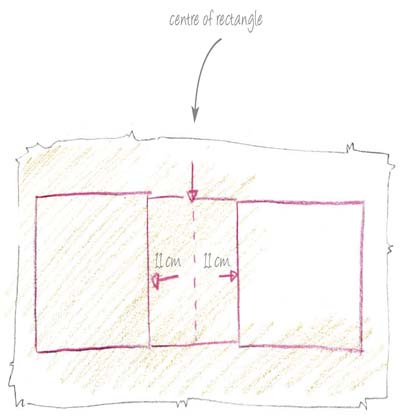
4. For the embroidered outer box, mark out a 84 x 22 cm rectangle on the reverse of your fabric. Find the centre of the rectangle by folding in half lengthways, then measure 11cm either side of this and mark with tailors’ chalk or a water-soluble pen – this forms the square panel that you will embroider. Cut around the rectangle with an allowance of 10cm fabric all around it so it fits securely in your embroidery hoop.
5. Choose the pattern you wish to embroider (see below) and trace on to thin paper. Transfer the pattern onto the fabric using tailor’s carbon paper. If the resulting pattern isn’t quite clear enough to see, go over the lines with an air-erasable pen.
6. Place the fabric in the embroidery hoop and embroider your stitches. When finished, press the fabric and use a damp cloth to remove any carbon or pen marks.
TO COMPLETE THE BOX
7. Trim the fabric to the drawn line. Cut out a 22 x 22cm square from the outer fabric and make up the box using the instructions for making the box lining (steps 1-3) but without leaving a turning hole.
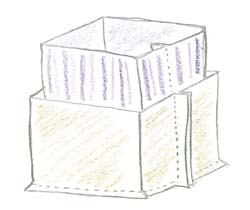 8. Place the lining box inside the outer box that is still inside out (so the right sides of the boxes are facing each other). Line up the two rear seams, then pin the top of the boxes together. Sew around the box top. (If you want to reinforce the box sides, you can cut four 20cm squares of cardboard and insert them into the box through the turning hole – you will need to leave a larger hole and insert the card at step 10.)
9. Turn the box the right way round through the turning hole. Press the top of the box with a damp cloth. Also press the four sides of the box – it is easiest to do this from the base of the box upwards, making sure the line pressed is at right angles to the base of the box.
10. Hand stitch the turning hole closed. To strengthen the box and enable it to keep its shape better, oversew each side of the box with blanket stitch, sewing through the outer fabric and the lining of the box. Now find your boxes a home where they can be seen and admired, and get organising!
Extra!
1. Line the boxes with a waterproof nylon if you want to use them in the bathroom for your lotions and potions.
2. If you wish to make lids, then simply make shallower boxes. Make them 24cm square and 8 cm deep.
3. These patterns are just the right shape for a set of square cushion covers.
 My Favourites







Speak Your Mind