In her book, Reclaim That: Upcycling your home with style, Sarah Heeringa shows us how to make reclaimed oven mitts.
 Reclaimism is the art of giving old products new value, says Sarah Heeringa. It embraces upcycling and the use of our imagination in the process of fixing things up and personalising objects to our own liking. In her new book, Reclaim That: Upcycling your home with style, Kiwi author Sarah Heeringa hones in on this popular trend and presents a range of reclaimed interiors and step-by-step projects to suit all ranges of skill. There’s everything from oven mitts and beanbags to furniture makeovers and painting techniques.
Through the rediscovery, repurposing and reusing of previously unwanted objects, Heeringa presents an inspiring picture for the art of reclaimed homemaking. Lots of projects to keep you busy. Would make a great gift for a home DIYer.
Text and images extracted with permission from Reclaim That: Upcycling your home with style by Sarah Heeringa, published by New Holland, $35.00.
Reclaim a set of oven mitts
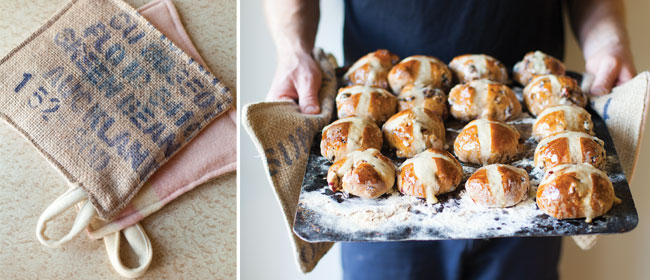
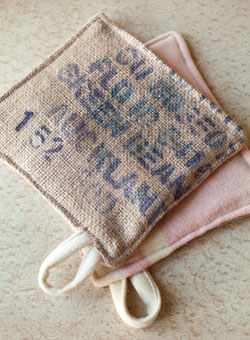 Fancy a fresh new set of oven mitts to use while baking? Upcycle a coffee sack and old woollen blanket fabric with this simple sewing project. You can pick up woollen blankets from charity shops and second hand stores. Empty coffee sacks are sometimes given away for free at cafes, or can be bought for a donation to charity or a minimal fee. Ask at your favourite local café that serves freshly ground Fairtrade coffee.
You will need:
Clean sacking material
Woollen fabric (approximately 1 metre square)
Sewing cotton to match your sacking and fabric
Sewing scissors
Iron
Sewing machine threaded with a thick needle
How to:
Choose a clean sack with a texture that is not too stiff and with interesting words or patterns printed onto the fabric. Decide what size and shape you want your oven mitts to be. Remember to allow approximately 2 cm along each edge for seams. I made mine a square shape 25 x 25 cm.
Cut two pieces of sacking to size. A raw edge of sacking fabric will fray easily, so start by zigzagging around the edges of your square.
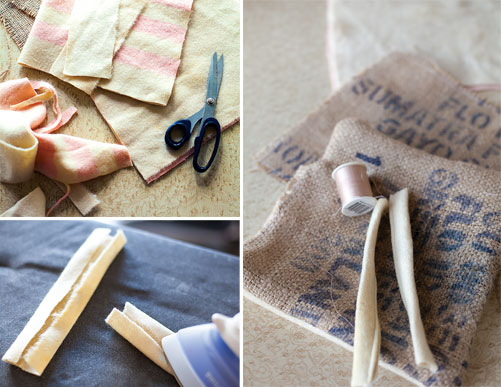
Next cut your woollen blanket material to the same size. The mitts are best if you have double thickness of wool, so you need 4 squares of fabric the same size as the sacking squares. Also cut two rectangles of woollen fabric 15 x 4.5 cm to make tabs.
Iron your woollen squares and rectangles so they are flat and smooth. To make the tabs, use a hot steam setting to iron the two rectangles with each side folded lengthwise into the middle, and then folded again. Iron flat. Sew along each folded tab, stitching approximately 5 mm from the folded fabric edge.
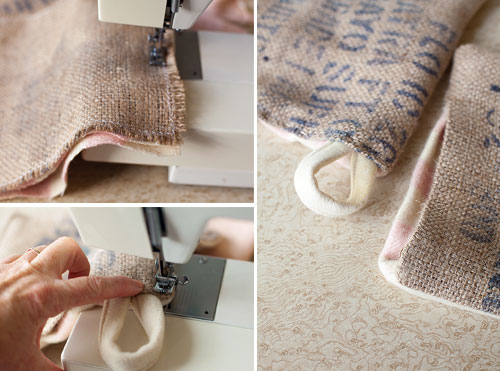
Place your sacking square topside down onto the two pieces of woollen fabric. Pin together. Sew along the edge of 3 sides of the square, stitching 1–2 cm from the folded fabric edge. Snip any extra fabric from across the corners and turn the mitt the right way out. You may need to use a blunt point such as the end of a wooden spoon handle to push out the corners.
Iron the mitt flat. Fold the two edges of the open side of the mitt into the inside of the mitt and iron flat. Take one tab and fold it in half. Poke it into the inside of the mitt to make a loop. Because of the thickness of the fabric it is best to place the two ends of the tab side by side. Pin in place.
Sew along the final edge of the mitt, securing the loops in place. Take care when sewing thick fabric to keep the sewing speed really slow – or you risk breaking your needle! Trim off any loose threads and you are done.
 My Favourites





Speak Your Mind