 My Favourites


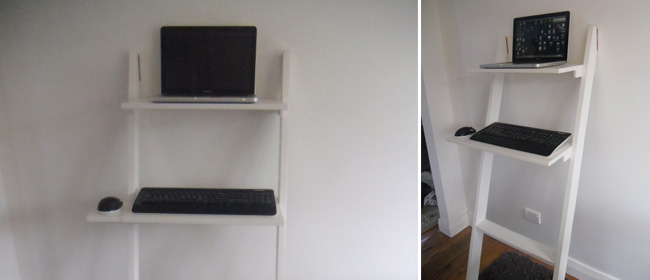 Sitting all day long? Improve your posture – and burn off some calories in the process – with this DIY standing desk. Editor Jane Wrigglesworth and her handyman dad show you how.
Many people these days sit in an office and never move from their desk the entire day. If that’s you, you might want to consider building yourself a standing desk to improve your posture. There is a bonus too. Standing rather than sitting will help you burn calories.
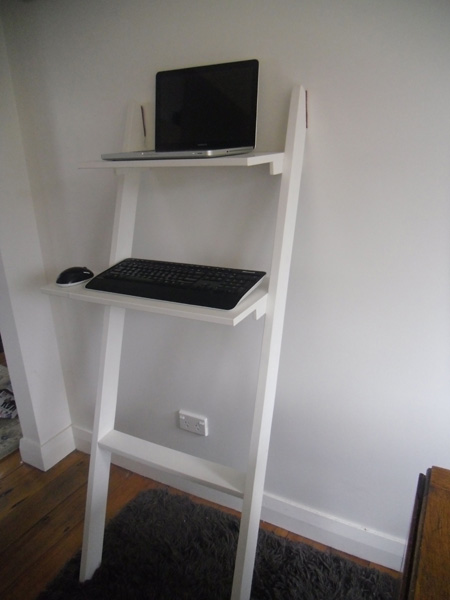
This is a simple ladder shelf-type desk, tailored to suit your own height. We made this one for a laptop with a wireless keyboard and mouse, though you can make it to suit a desktop computer as well.
Materials
Pine or wood of your choice
Saw
T-bevel for measuring angles
Screws
Felt pieces
Small level
Paint
Method
1. First, measure where the height of the shelves will go. You will need another person to help you here. Stand straight and hold your arms out at right angles, with your fingers flexed as if you were typing. Measure the distance from the floor to your fingers and subtract 1cm. That’s where your shelf for your keyboard will go.
2. Still standing, look straight ahead. Hold your laptop or computer directly in front of you so the top of the screen is level with your eyes. Have someone measure the distance from the floor to the bottom of your computer. That’s where the shelf for your computer will go.
3. Cut two uprights. This may vary from person to person, depending on the individual’s height. Ours measure 150cm (1.6 yards) long.
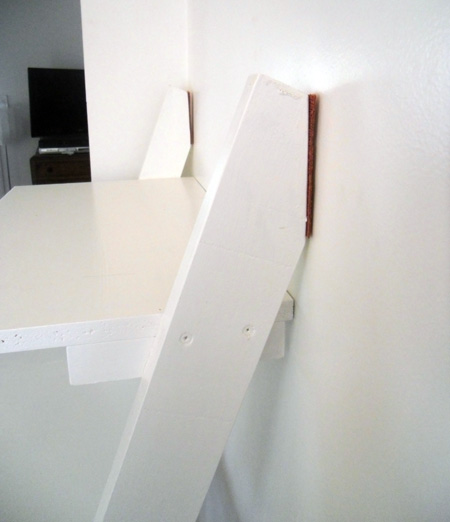
4. Cut angles at the bottom and top ends of the uprights so they sit nicely against the wall and on the floor. For the bottom end, which sits on the floor, cut an angle of 18 degrees. For the top end, measure in 3cm, then cut your angle down from here (see image below). We cut our angle at 22 degrees. Glue small pieces of felt to the cut angles to prevent marks on the wall.
5. Measure your keyboard and add an extra 3cm. Add on another 15cm for your mouse. Cut keyboard shelf to this size. Our keyboard measured 47cm long, so our total shelf measurement was 65cm. The diameter of the shelf is 30cm (12 inches).
On the side that your mouse sits (ours is on the left side), cut an indent at the back of the shelf, 12cm up from the back and 15cm in from the side (see image below). Attach shelf with screws. Use a level to ensure it is level. Fix a small brace, 15cm long x 3cm wide, underneath the shelf for support (refer to image below) on either side.
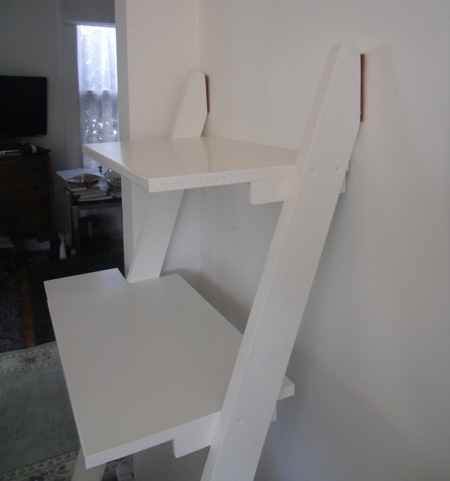
6. Cut your top shelf 50cm long (47cm + 3cm), or the length that you used above, and 30cm (12 inches) in diameter. Attach to the uprights, then attach braces.
7. Cut a 50cm long support piece and attach to uprights near the bottom. Attach felt to the bottom of the uprights and the tops where they sit against the wall. Paint your desk.


Brilliant!!! Thank you so much.
I really need one of these!
It’s really superb. I love it.
The legs sticking out don’t bother you? Do you have to straddle the feet or does the keyboard shelf come out far enough to not be a problem?
No, you stand in between the feet. It’s not a problem. 🙂
Can you please tell the dime signs of the shelf size 50cm x ? And 65 cm x ?
Also what angle were the shelves slanted down from the 2x4s to allow access to the keyboard? Didn’t look like 90 degrees on photo. Thanks.
Hi Bog
Good question. The diameter of the shelves is 30cm (12 inches). I will put that in the text.
We no longer have the desk so, sorry, I cannot measure the angle of shelves where they attach to the 2x4s. We just used a level to ensure the shevles were level.
Hope that helps.
Ok thanks. So they were level? Wasn’t sure if they slanted downward slightly for easier keyboard access based on the picture. Thanks!
Yes, the shelves are level. They do look like they are slightly slanted in the photos, but they are level.