By Jane
Make Life Easy
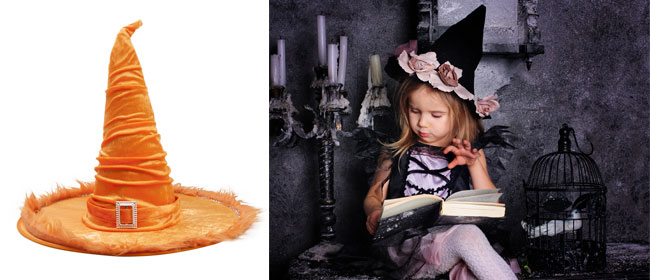
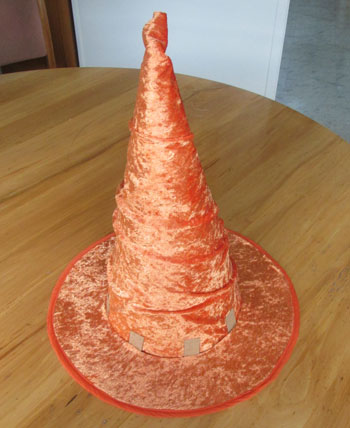
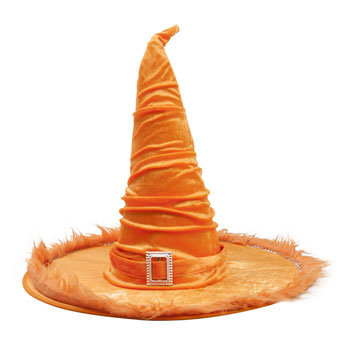
Goblins and ghouls and ghosts will be terrorising the neighbourhood on 31st October, so it seems only fair that I should terrorise them back. In my spooktacular witch’s hat. I made this hat the other day, though to be fair it’s probably a bit less of the terrifying and more of the pretty. At least, I think it’s pretty.
You can make your hat any colour you like, of course, though I rather like orange.
Materials
- 1 x 63.5cm x 51cm (25 x 20 inch) sheet thin black cardboard (for cone)
- 1 x 63.5cm x 51cm (25 x 20 inch) sheet of sturdy cardboard (for brim)
- 5cm x 20cm (2 x 8 inch) extra piece of sturdy cardboard (for tabs)
- 60cm x 147cm wide (24 x 58 inch) velvet-like fabric to cover cardboard
- Orange cotton bias binding (or colour of your fabric)
- Buckle
- Pencil
- Scissors
- Strong craft glue
- Needle and orange thread
- Sewing machine
Instructions
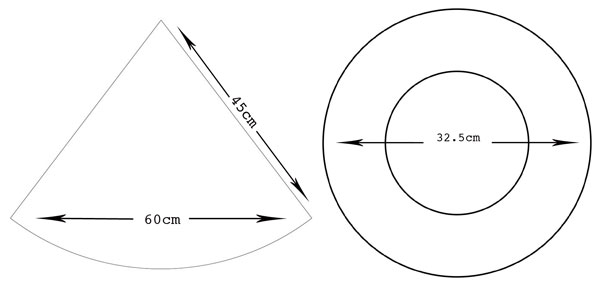
1. Draw a cone shape on the thinner cardboard according to the diagram. Draw a circle on the thicker cardboard. Cut a hole in the middle of the hat brim to fit your child’s (or your) head.
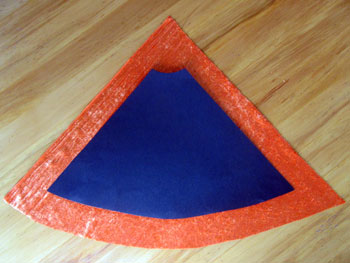
2. Use the cardboard cone shape to cut your fabric. Cut it 8cm (3 inches) bigger than the cardboard cone to allow room for bunching up the fabric. If you do not wish to bunch up your fabric, cut it only 2.5cm (1 inch) bigger than the cardboard cone.
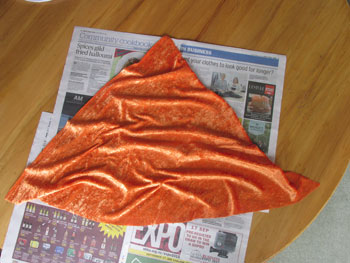
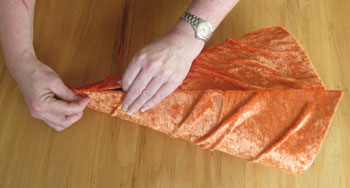
3. Cut off the top 6cm (2 ½ inches) of the cardboard cone (not the fabric). Apply glue to the cardboard and fabric (leaving the top of the fabric free) and press fabric over cardboard cone with the edges overlapping. Bunch the fabric up, as shown. Press down so the glue adheres.
4. Turn over, so the cardboard is showing. Trip the sides and bottom edges of the fabric to about 2.5cm (1 inch) all around. Glue the edges and fold them over onto the cardboard cone, leaving the top free. You will need to cut the corners off the fabric so that it folds over neatly.
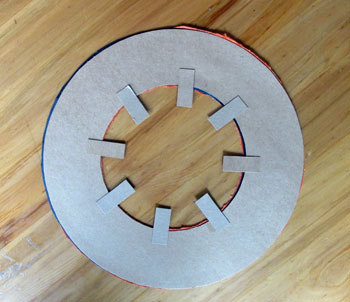
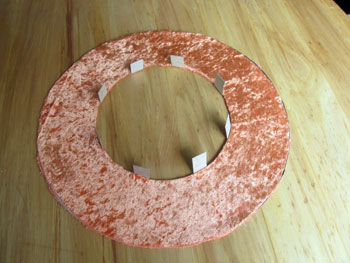
5. Cut 2 circles from your fabric, the same size as the cardboard circle. Glue one piece of fabric to one side of the cardboard circle. Cut out the circle in the centre. Lay it down the so cardboard side is showing. Cut 8 tabs from thick cardboard, 2cm x 5cm each. Space and glue them around the inner edge so half the tab is overhanging the edge, as shown. Glue the other fabric piece on top. When dry, cut out the centre of the fabric and fold up the tabs.
6. Roll up the cone and, using needle and thread, stitch the edges together.
7. Stitch the bias binding to the rim of the hat brim. Place the brim over the cone so the tabs are on the outside. Stitch or glue the tabs to the cone.
8. Cut an extra strip of fabric 60cm long x 10cm wide. Thread through a buckle and place the fabric around the cone at the base to cover the tabs. Hand-stitch in place. Optional: glue a strip of fur fabric, or even flowers, around the rim.
 My Favourites




Speak Your Mind