 My Favourites


By Jane
Make Life Easy
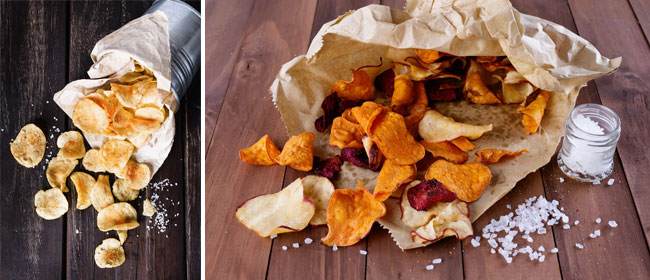
These homemade chips are so delicious that no one will have the remotest clue they’re homemade. Truly. They taste just like the bought ones. But much healthier. And crisp! They are quick to make, too – cooked in the microwave.
Once you’ve made these I reckon you’ll probably want to experiment with all and sundry (like me). Try sweet potato, beetroot and pumpkin chips for more tasty snacks.
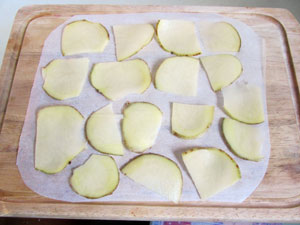
Before cooking, sandwich the slices between parchment paper. Lightly sprinkle with salt or herbs.
But experiment first with a potato. Scrub the potato clean (there is no need to peel it) then slice it thinly. This is where a hand slicer or a food processor with a slicing attachment comes in handy – I used my trusty Kenwood. Though if you have a stead hand, you can just use a knife to cut thin slices.
Place the slices between two pieces of parchment paper. Season with a sprinkle of salt (not too much) or dried herbs or garlic salt and cook in the microwave for 3-5 minutes, until lightly browned. (My microwave is 1200 watts – so adjust cooking times to suit your microwave wattage.) Always start with a lower time – say 2.5 minutes, or 3 minutes, so as not to burn your chips. Then add 30 seconds at a time, checking after each bout in the microwave. After a while you will get an idea of how long your chips need in the microwave. Note that kumara (sweet potato) needs far less time, usually around 2 to 2.5 minutes all up. Experiment with the times, but always start on a lower time first.
And that’s it! If they are not crisp, they are not ready. It’s as simple as that.

Homemade kumara chips. They take less time in the microwave than potato chips.
Once cooled, the chips can be stored in an airtight container. Make sure they are completely cooled before storing, or they will go soft.
Note: If slicing potatoes and storing in water until use, make sure you pat the slices dry with a clean tea towel before microwaving, otherwise the slices will take longer to cook and won’t be as crisp.


Would you please expand on the cooking info? What temperature oven do you use? In the end note you mention microwaving? When does that take place?
Sorry Jules. You are quite right! I forgot to say that these are cooked in the microwave. Have adjusted the text now. My microwave is 1200 watts.
These are fantastic! Thanks for sharing the recipe. I used a metal cheese slice to cut the potato and used a kitchen paper towel to soak up the potato juice before putting on baking paper. Is parchment paper completely un-waxed? I haven’t used it before.
Great idea with the cheese slice!
Parchment paper is usually coated with a silicon, so it can withstand higher temperatures than waxed paper. In fact, parchment paper is specifically treated for oven use. Though good to know you can use baking paper too.
Nom Nom, I used the oven, delicious!